Models
Introduction
Models are pre-trained or custom AI systems designed to perform specific tasks such as natural language processing (NLP), computer vision, time series analysis, and audio processing. In Thinkflows, models serve as processing engines that convert inputs into actionable outputs.
This guide explains how to upload a model in two steps.
How to Upload a Model
Prerequisites
Have a Creator Role account.
Prepare the following required files:
metadata.jsonInput.jsonOutput.json
Step 1: Enter Model Details
- Click the Models tab at the top of the navigation.
- Click Upload model.

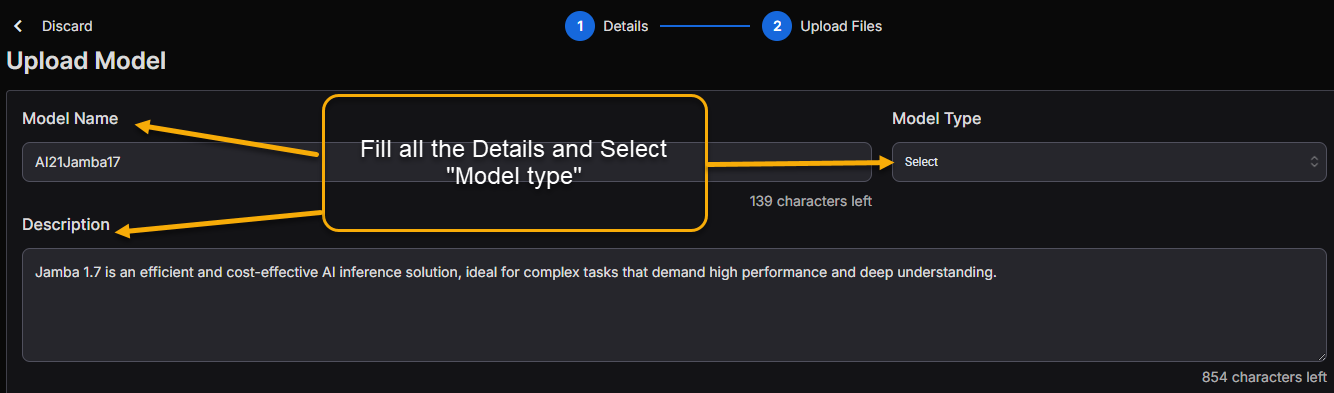
On the upload model page, enter the following information:
Model Name – Provide a descriptive name (maximum 150 characters).
Model Type – Select Computer Vision, NLP, Time Series, or Audio.
Description – Write a concise summary of the model (up to 1,000 characters).
Warning: Duplicate model names are not allowed. The platform will display an error if the name already exists.
- Framework – Select PyTorch, TensorFlow, JAX, or Hugging Face.
- License – Select GPL, MIT, Apache 2.0, BSD, or CC BY-SA.
- Visibility – Select Public, Private, or Organization.
- Thumbnail (optional) – Drag or click to upload an image file.
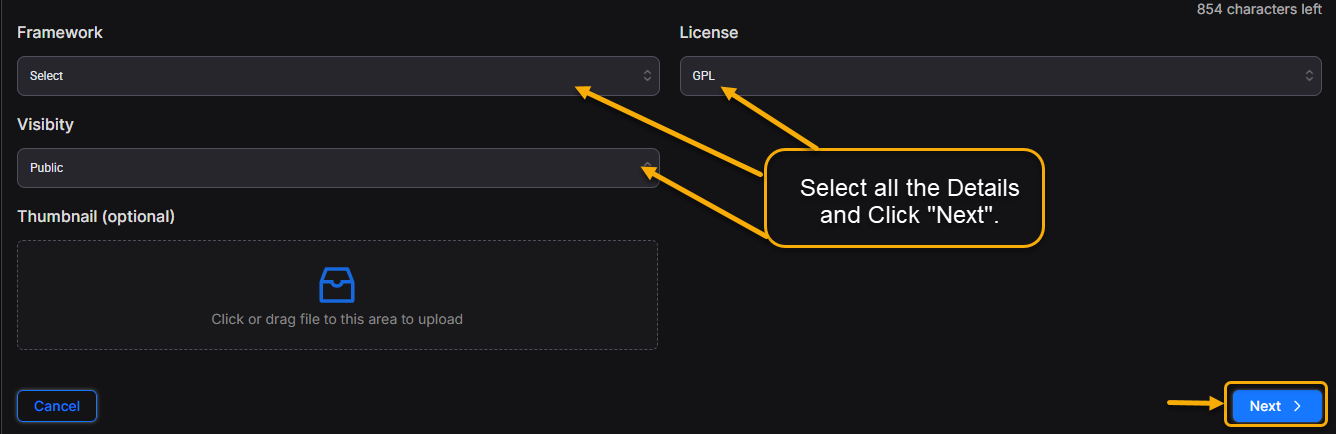
- Click Next to proceed to the file upload stage.
Step 2: Upload Files and Configure Endpoints
Model Weight Files
- On the Upload Files page, drag or click the Upload icon.
Note: If you are unsure which file types to use, click on Guide to Weight Files.
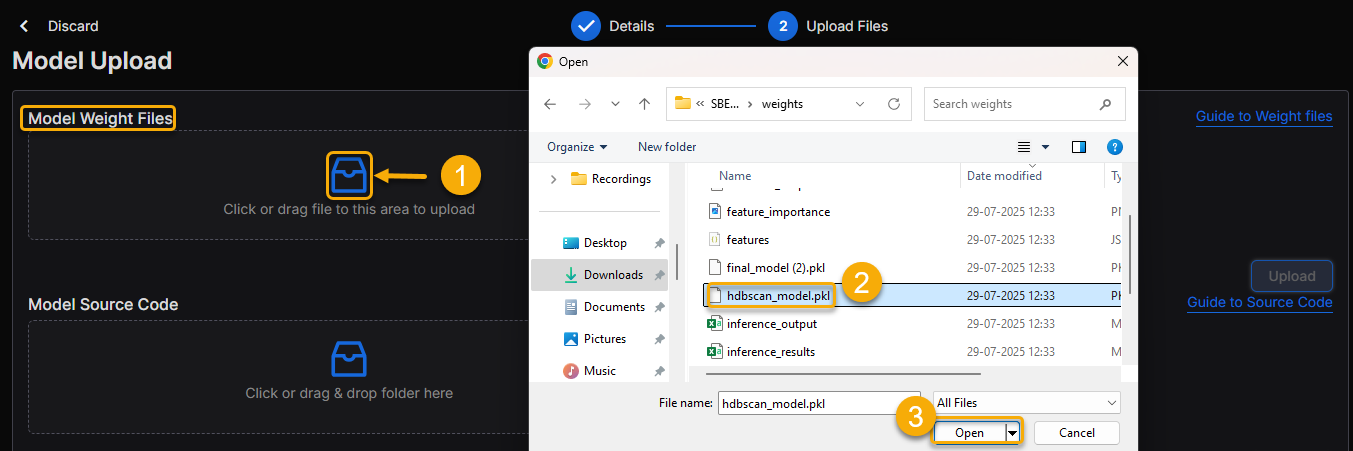
- The local file browser opens. Select the required weight files.
- The selected files appear in a list to the right of the upload icon.
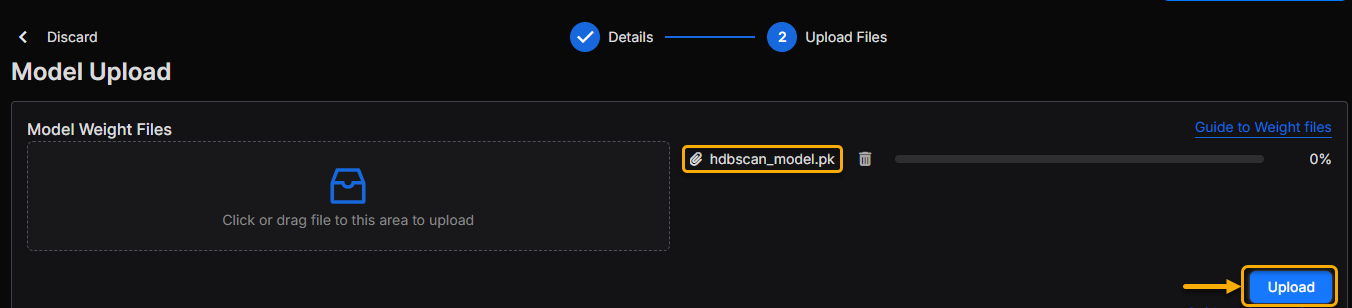
- Click the Upload icon (enabled in blue) on the right side.
Model Source Code
- Click or drag and drop the Model source folder into the upload area.

- Select the folder that contains the model’s source code.
Note: Click on Guide to Source code. to download.
- Make sure it includes:
Metadata.jsonInput.jsonOutput.json
- The selected folder files appear in a list to the right of the upload icon.
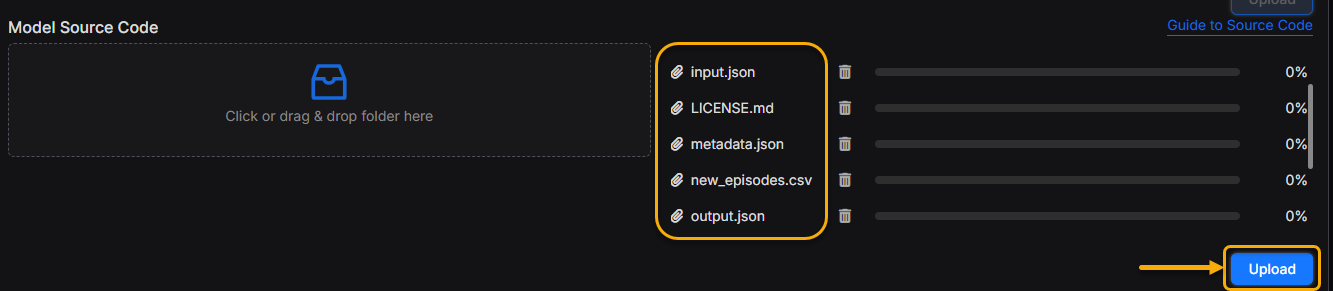
Click the blue Upload button to proceed.
Click Next to move to the configuration stage.
Configure the Model Endpoints:
You can configure model endpoints in two ways:
- Manual configuration
- CSV file upload
Option 1: Manually configure
- Enter the following for each endpoint:

- Display Name – Enter the name of the endpoint.
- Method – Select GET, POST, PUT, or DELETE.
- URL Template – Enter the API URL template.
- Click Add to save each endpoint.
- This section includes a radio button. Select this button to mark the endpoint as the primary endpoint for your model.
Option 2: CSV File upload
- Click Guide to CSV Files, and a pop-up will appear on the right side of the screen to download the sample CSV Excel file.

- Open the CSV in Excel, and add as many endpoints as needed (Display Name, Method, and URL Template).
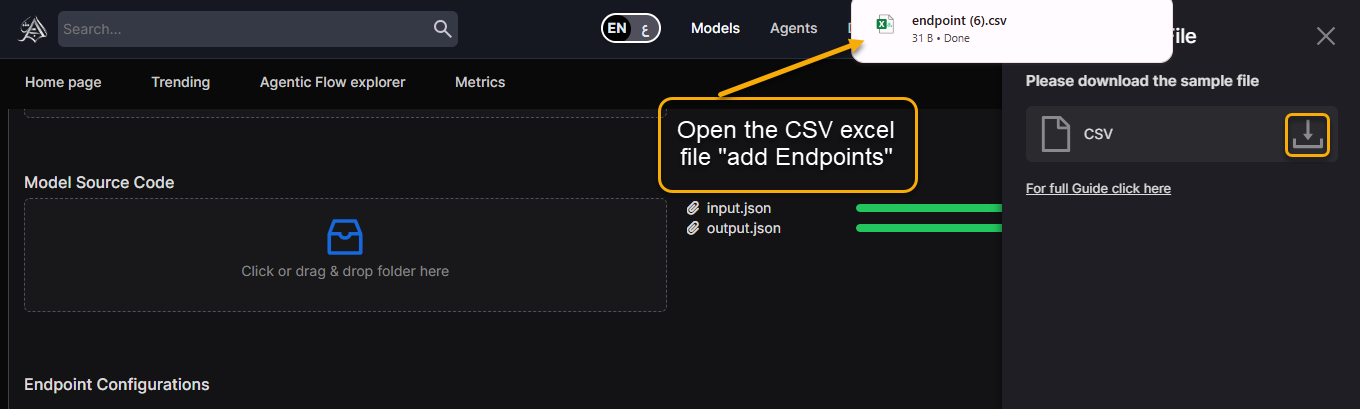
- Save the CSV Excel file locally.
- Click Upload CSV File to import your configurations.
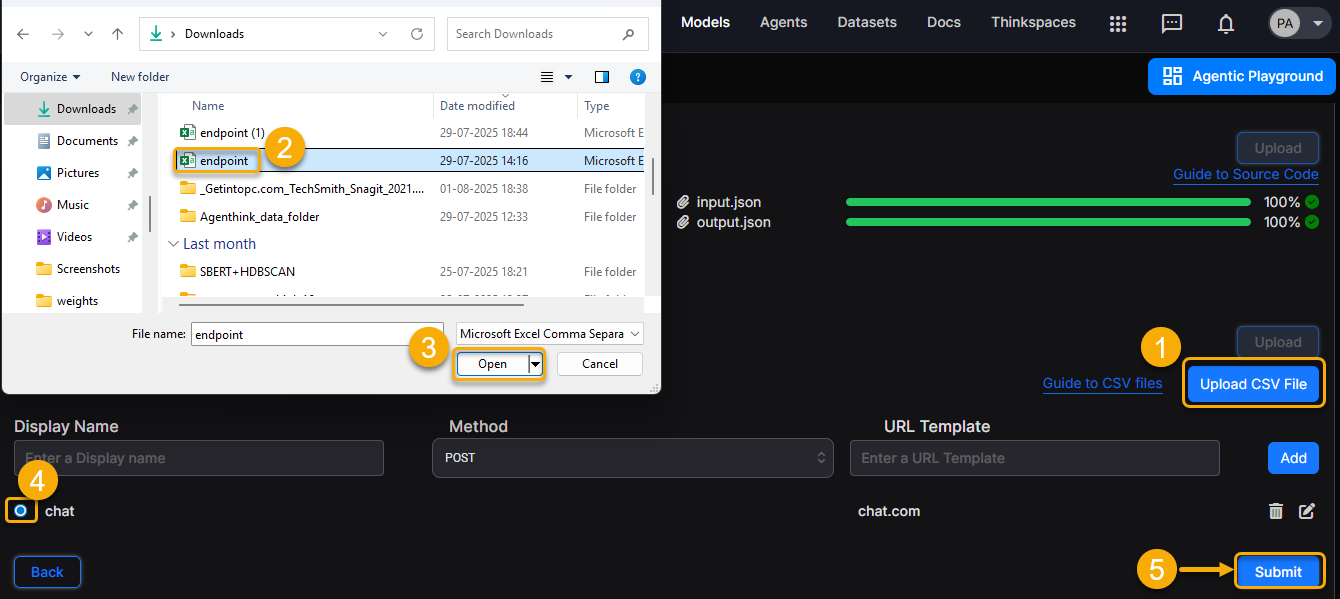
This section includes a radio button. Select this button to mark the endpoint as the primary endpoint for your model.
Click Submit to complete the setup.
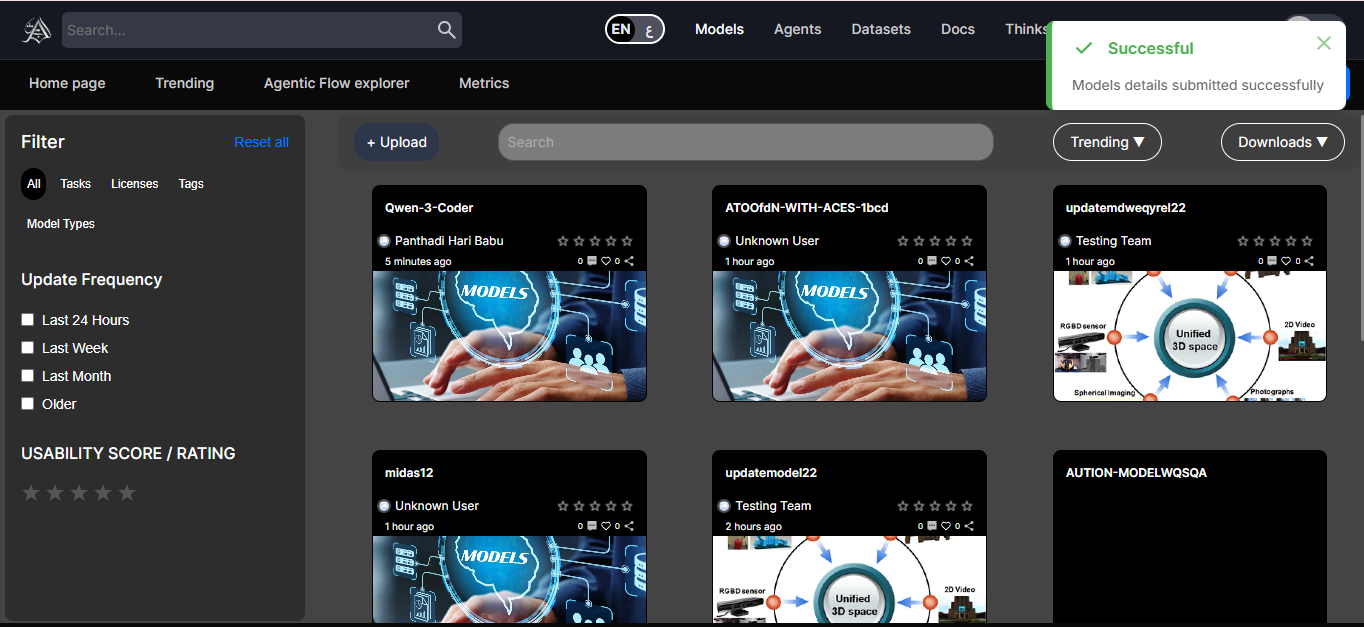
- Upon successful upload, the platform displays a confirmation message. Your model is now available in the Models Library and can be used in Thinkflows.