Gmail Tool
Introduction
The Gmail Tool brings Gmail functionality directly into your AgenThink workspace. You can send, read, label, forward, and manage emails without switching apps or writing code.
Why this matters
Automate email tasks within your Thinkflows to save time, reduce manual effort, and maintain organization within your Thinkflows.
Who should use this tool?
Creators, teams, daily users, and businesses that want to integrate Gmail into their automated flows.
Prerequisites
Before you begin, make sure you have:
- A valid Gmail account.
- An active AgenThink account.
- Gmail API credentials from Google Cloud Console.
Warning: You cannot connect Gmail to AgenThink without valid Gmail API credentials.
Accessing the Gmail Tool
- Sign in to your AgenThink account.
- In the top-right corner, open your profile menu and switch to the Creator role.
- From the dashboard, select Agentic Playground.
- Under Thinkflows, choose one of the following options:
- Custom Flow: Create a new Thinkflow and manually add the Gmail Tool.
- Click Add Components.
- In the search box, type Gmail Tool.
- Drag and drop the Gmail Tool onto the canvas.
Note: You can quickly find and add most tools through the Add Components menu.
Connecting Gmail to AgenThink
Step 1: Enable the Gmail API
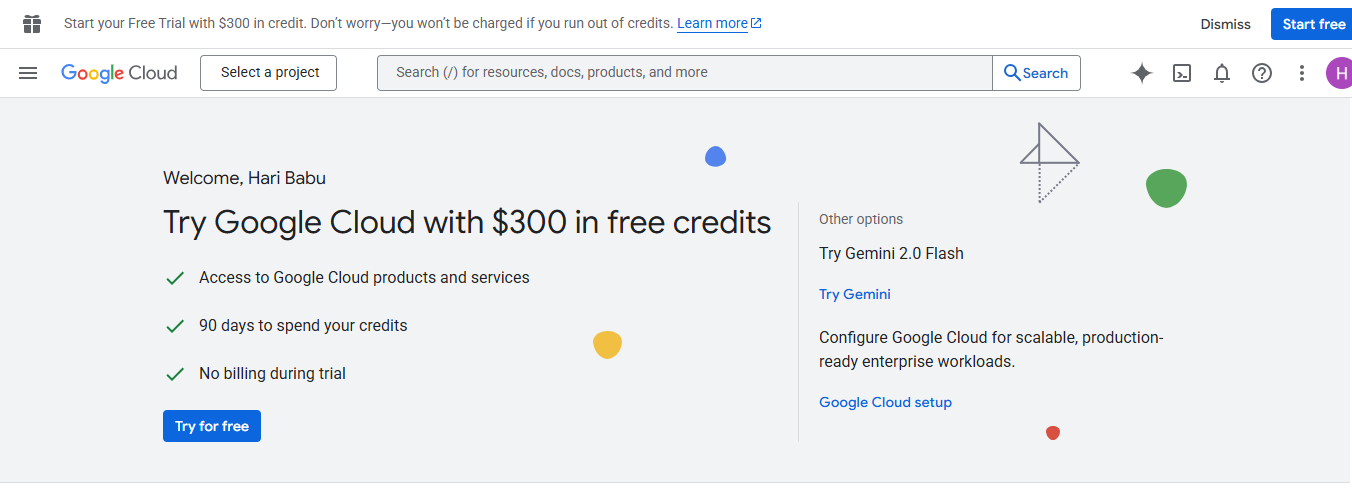
- Go to Google Cloude Console.
- Sign in with your Gmail account.
- In the search bar, type Gmail API.
- Select Gmail API → Enable.
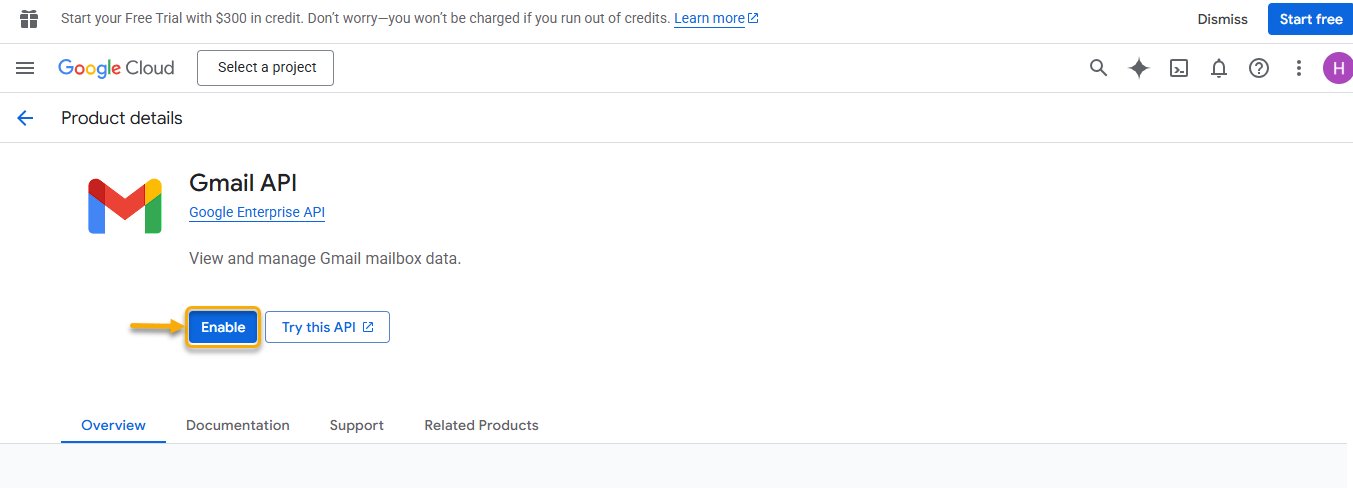
Caution: Ensure you enable the API for the correct Google project linked to your AgenThink Thinkflow.
Step 2: Configure the OAuth Consent Screen
- After you enable the Gmail API, Google Cloud Console redirects you to the Credentials page.
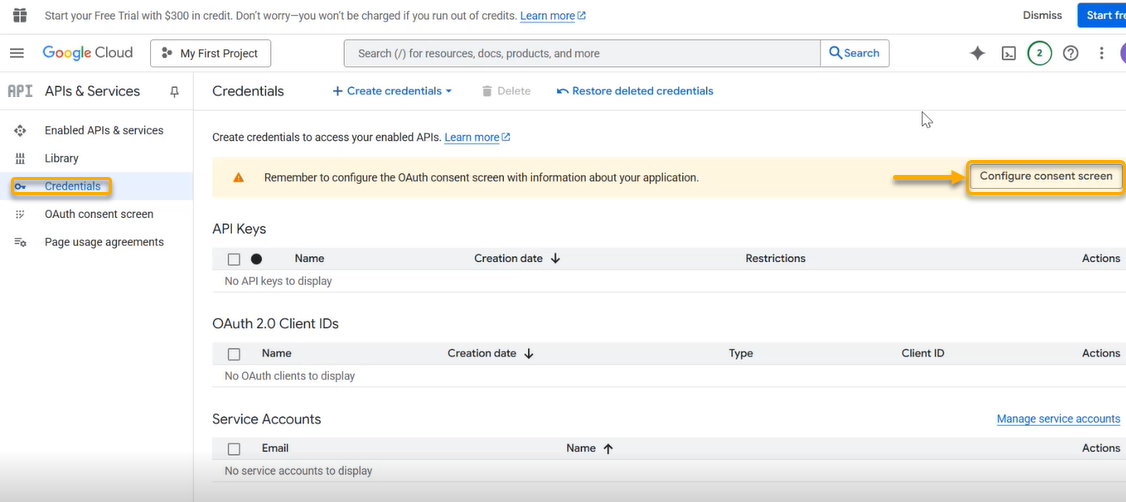
- On the warning callout, select Configure consent screen.
- On the OAuth Overview page, click Get Started.
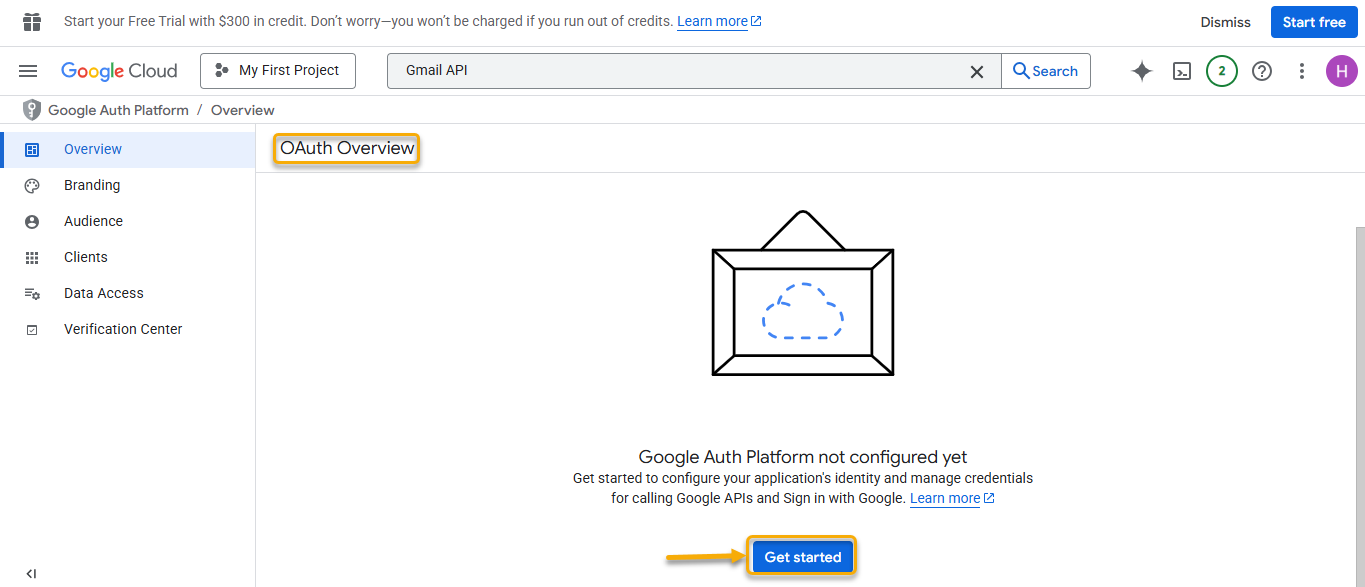
- The Project Configuration page appears.
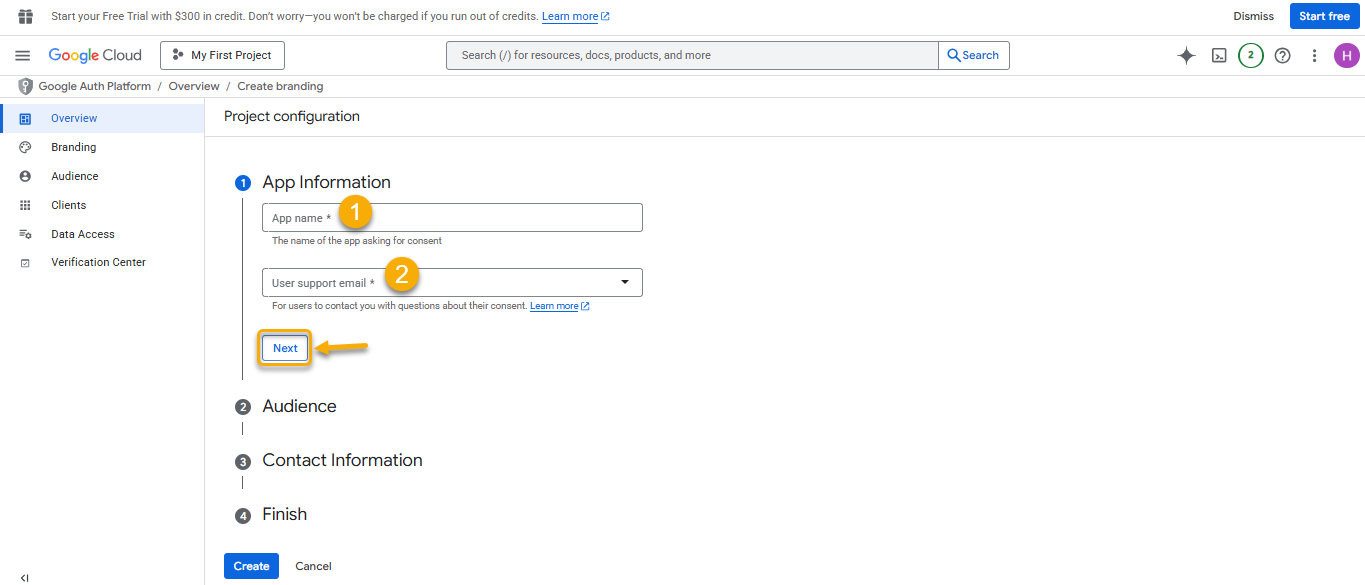
- Fill in the App Information:
- App name
- User support email
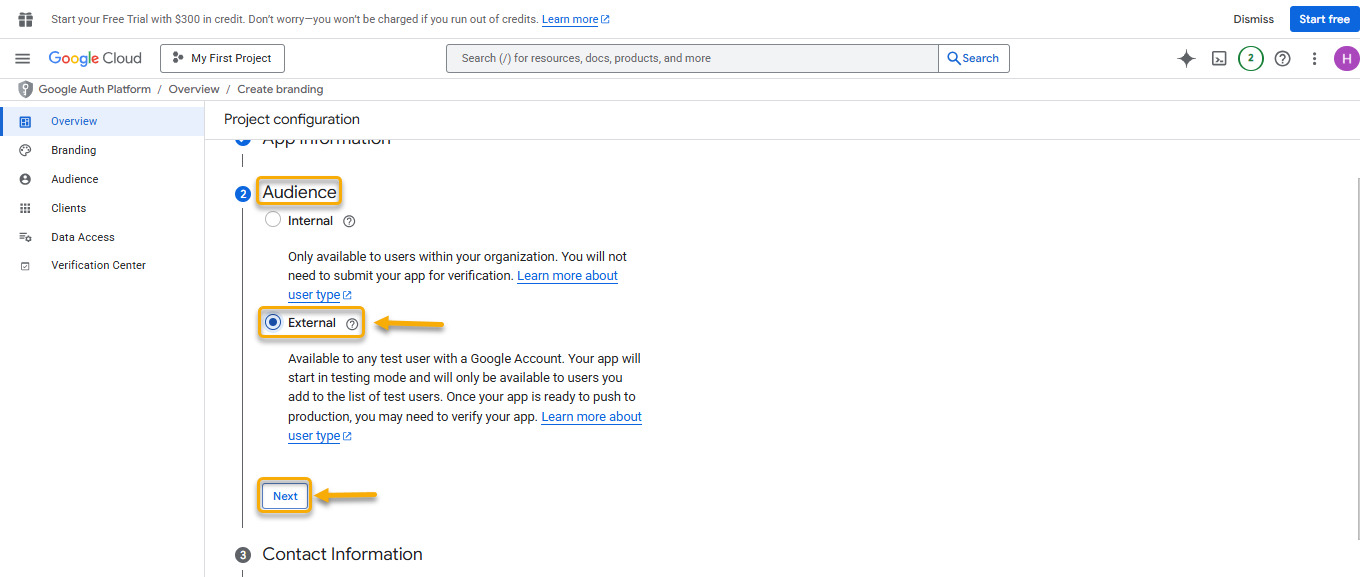
- Under Audience, select External → Next.
- Under Contact Information, enter your email address → Next.
- In the Finish section, select the check box to agree to the Google API Services: User Data Policy.
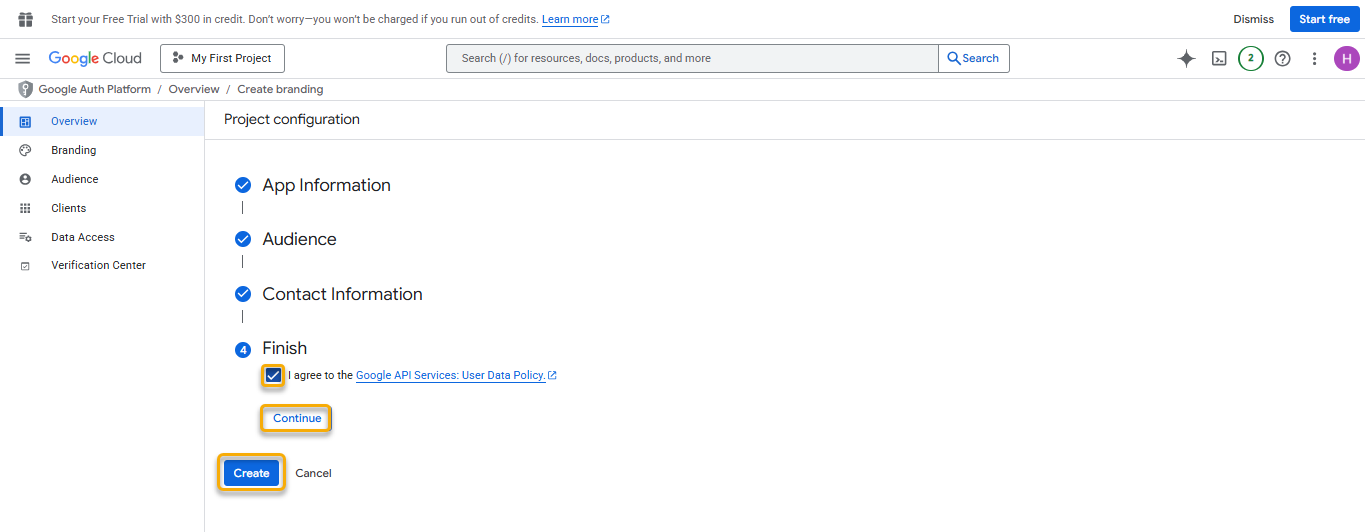
- Click Continue → Create.
- The system redirects you to the OAuth Overview page.
Note: Google requires you to complete the consent screen setup before creating OAuth credentials.
Step 3: Create OAuth Credentials
- In the search bar, type Credentials and open the page.
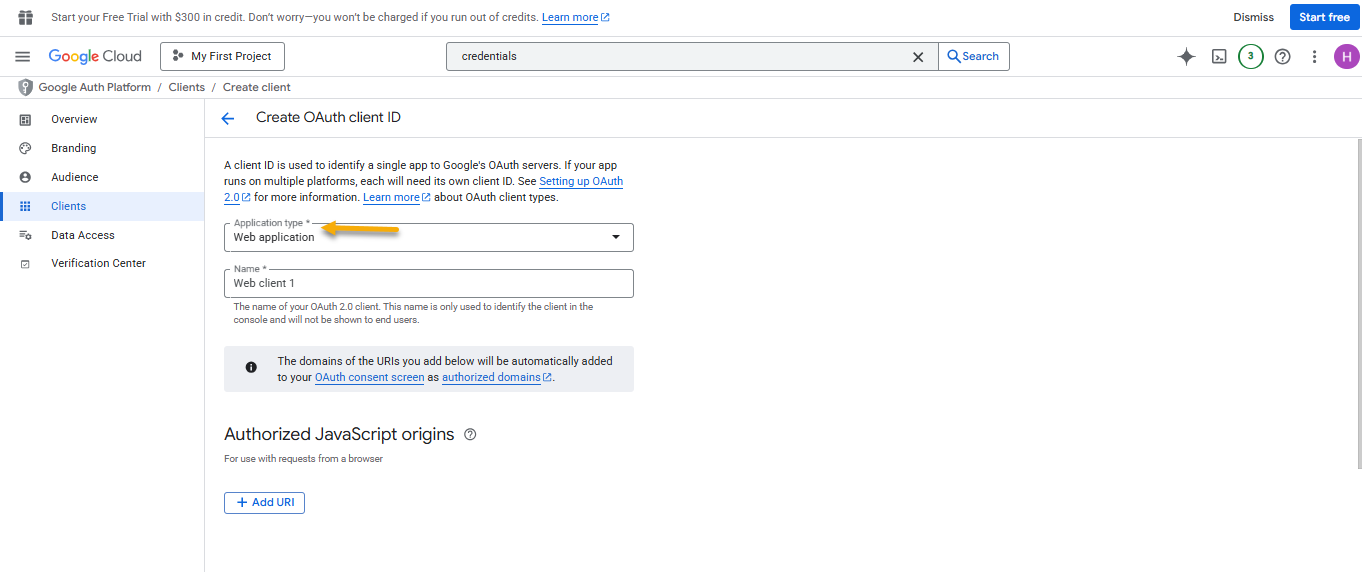
- Select Create Credentials, select OAuth Client ID.
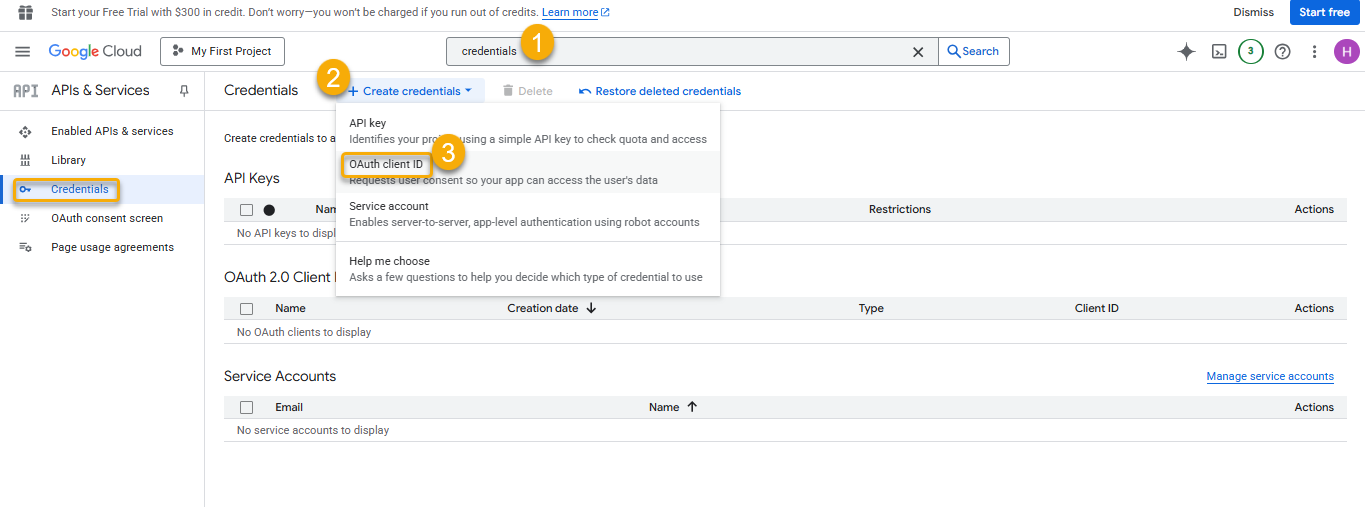
- Under Application type, select Web application.
- Switch to the AgenThink platform:
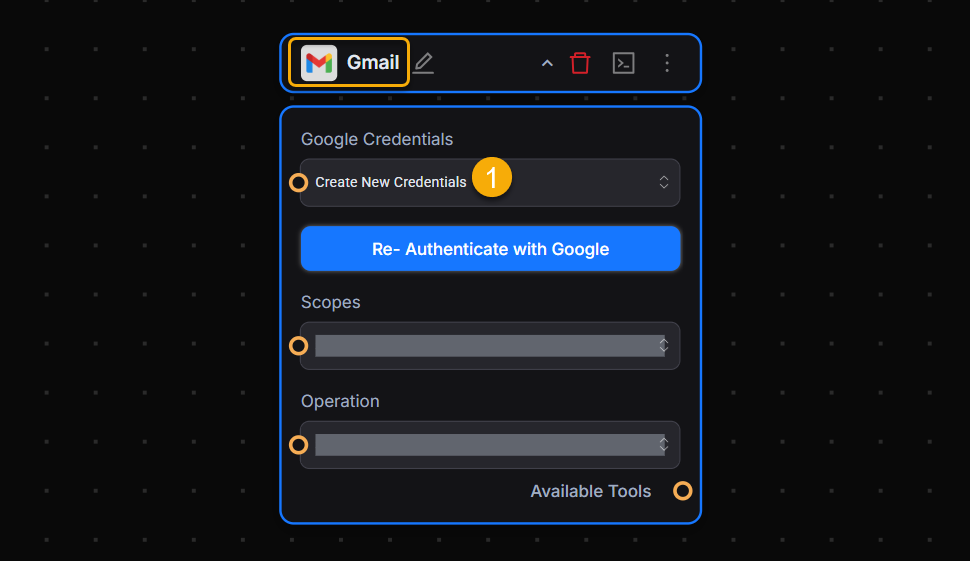
- Open the Gmail Tool Flow.
- In the Google Credentials section, select Create New Credential.
- Copy the Redirect URL from the AgenThink pop-up.
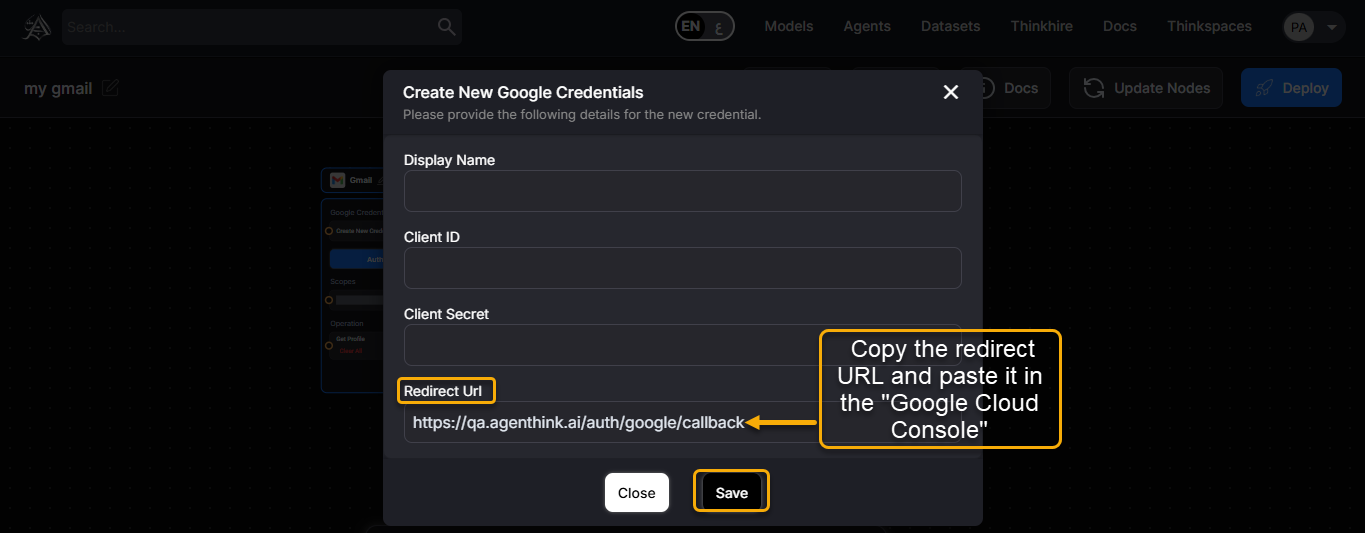
- Return to Google Cloud Console and paste the copied URL under Authorized Redirect URLs.
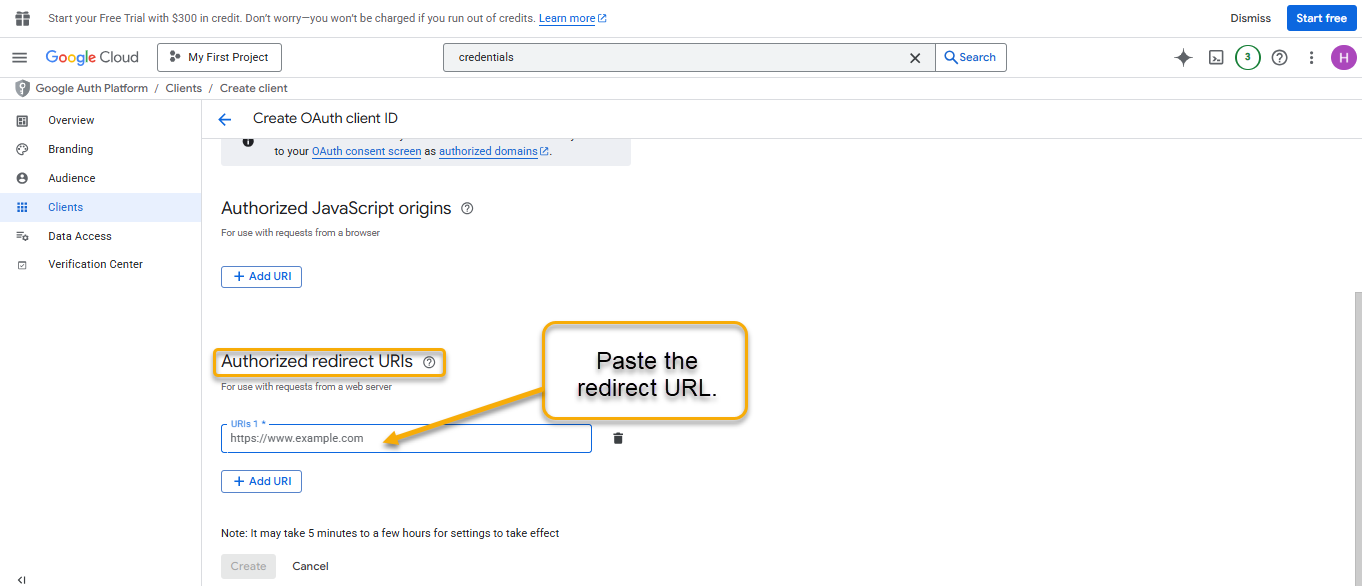
- Click Create.
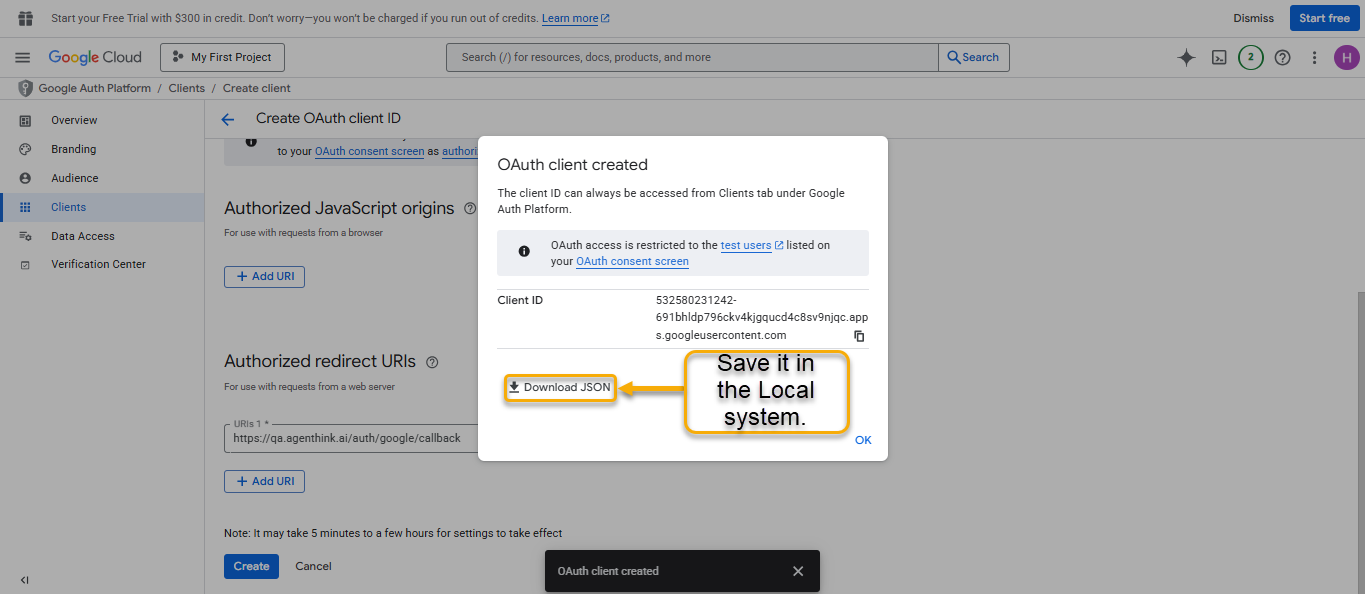
- Copy the Client ID and Client Secret from the confirmation pop-up.
- Download the credentials JSON file and store it securely on your local system.
Security Tip: Never share your credentials JSON file. Store it securely to prevent unauthorized access.
Step 4: Add Test Users
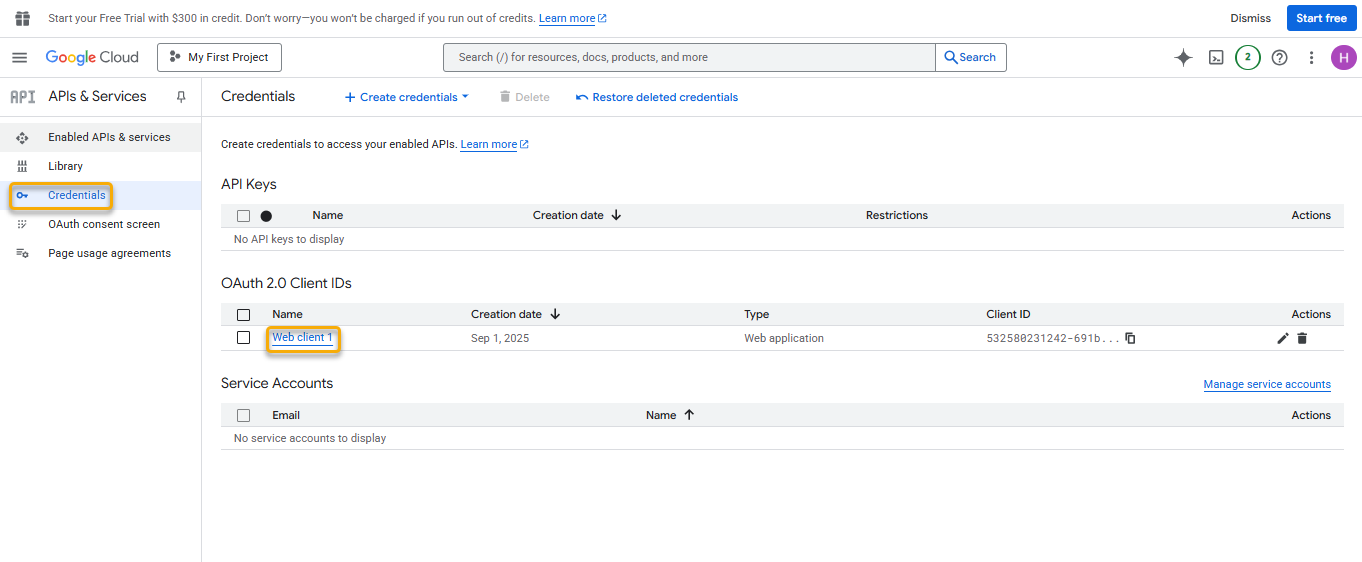
From the Credentials page:
- Under OAuth 2.0 Client IDs, select your Web client.
- In the left navigation, select Audience.

- In the Test Users section, click + Add users.
- Enter the Gmail address you want to authorize and select Save.

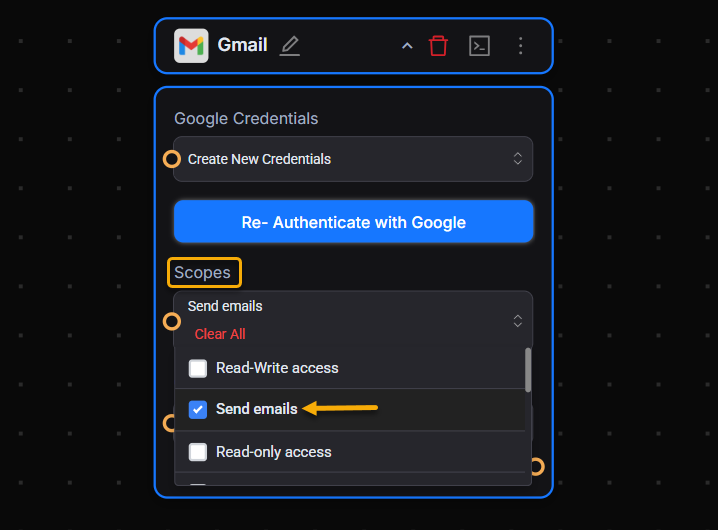
Step 5: Configure Gmail Tool in AgenThink
- Open the Gmail Tool flow in AgenThink.
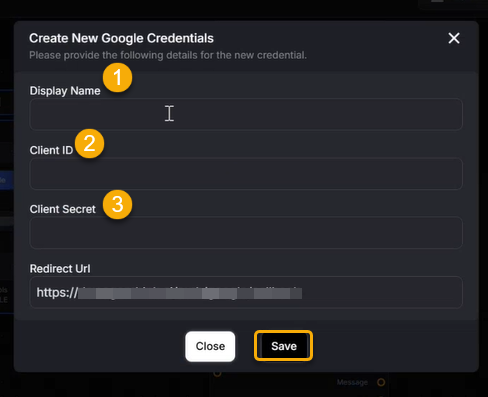
- In the Google Credentials section, select Create New Google Credentials.
- Paste your Client ID, Client Secret, and enter the display name.
- Click Save.
- Select only the required Gmail scopes (e.g., Send Mail).
- Click Save.

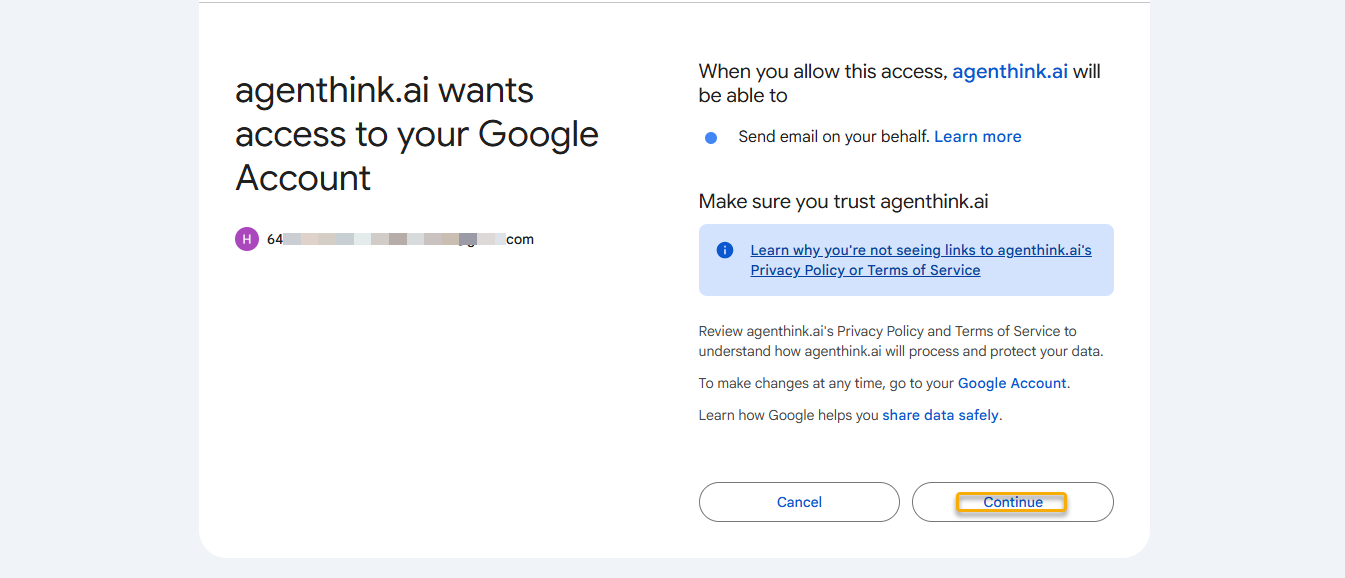
Step 6: Authenticate Gmail
- In the Gmail Tool, click Authenticate.
- A Google login pop-up appears. Sign in with your Gmail account.
- Review and accept the requested permissions.
- Click Continue → Save.
Verifying Gmail Tool in a Thinkflow
- Connect the Gmail Tool output port to the input port of the LLM component (e.g., OpenAI Tool).
- In the OpenAI Tool:
- Add your API key
- Provide an Input prompt (e.g., “Get my profile”)
- Connect the OpenAI output port (messages) to the input port of a Chat component.
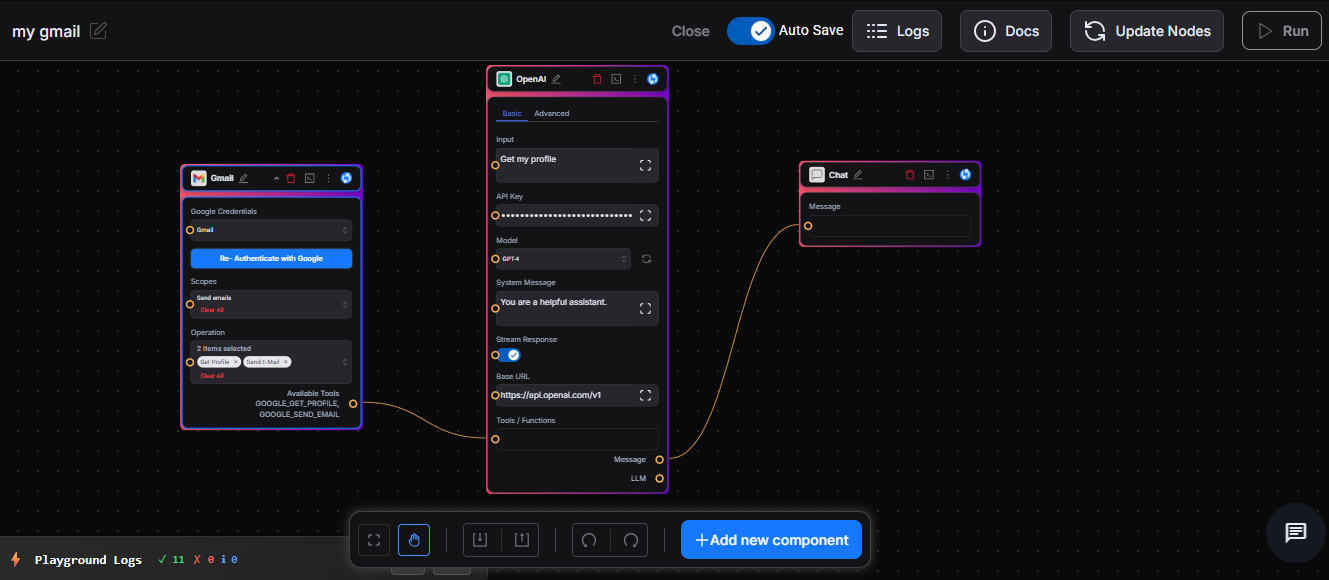
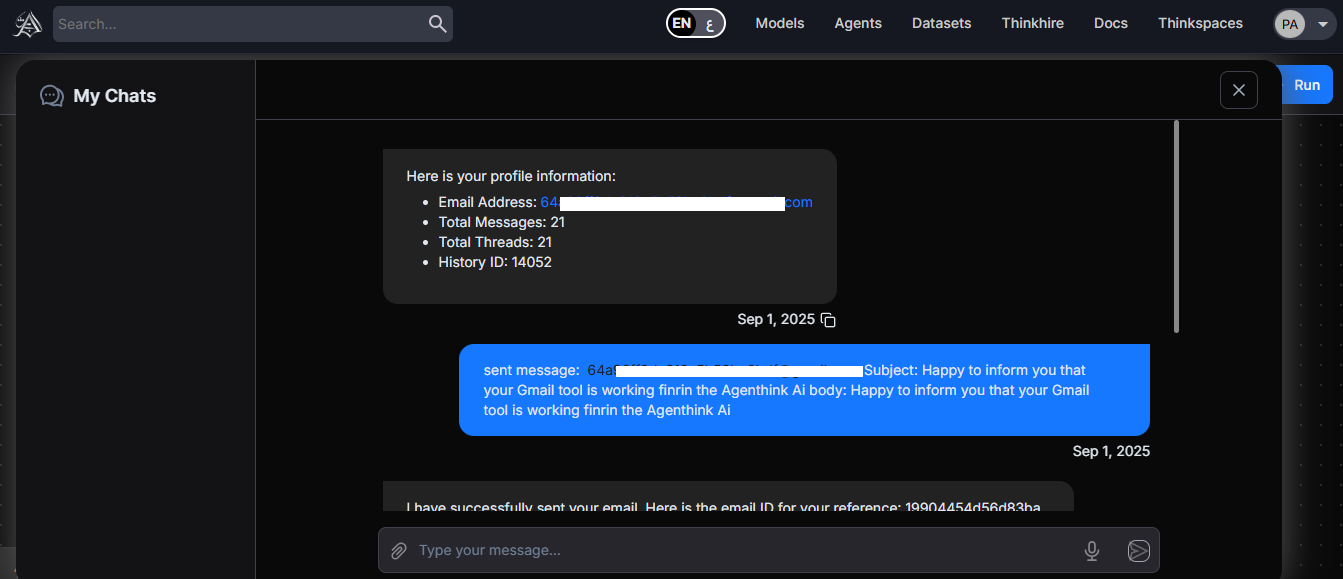
- In the Gmail Tool, select the operation you want (e.g., Get Profile) from the dropdown.
- Click Save → Auto Save → Deploy → Run.
- The My Chats window will display the Gmail operation result.