Agentic Playground
Introduction
The AgenThink AI platform features a no-code visual development environment called the Agentic Playground. Use the Playground to design, build, and run intelligent Thinkflows powered by large language models (LLMs).
This guide provides detailed instructions on using the Playground and configuring flow components.
Getting Started
Prerequisites
A registered AgenThink AI account.
Creator access enabled.
Prepared models, datasets, and agents.
Valid API Key for agents (mandatory).
API Key for external models (required only for providers such as OpenAI).
Important: Agents require a valid API key to run.
Accessing the Agentic Playground
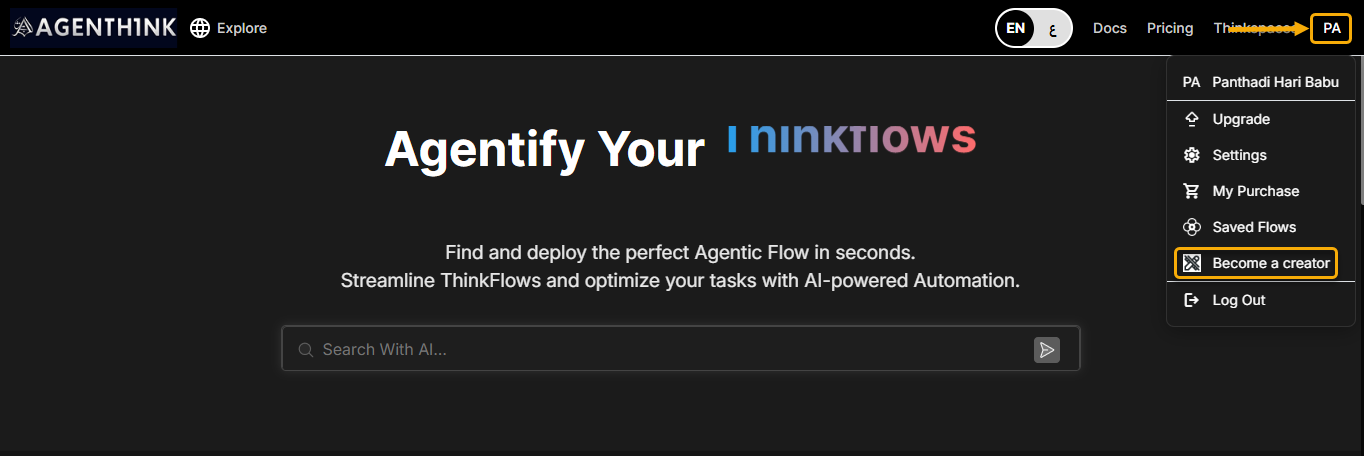
- Sign in at AgenThink.ai.
- Select your profile icon, then select Become a Creator.
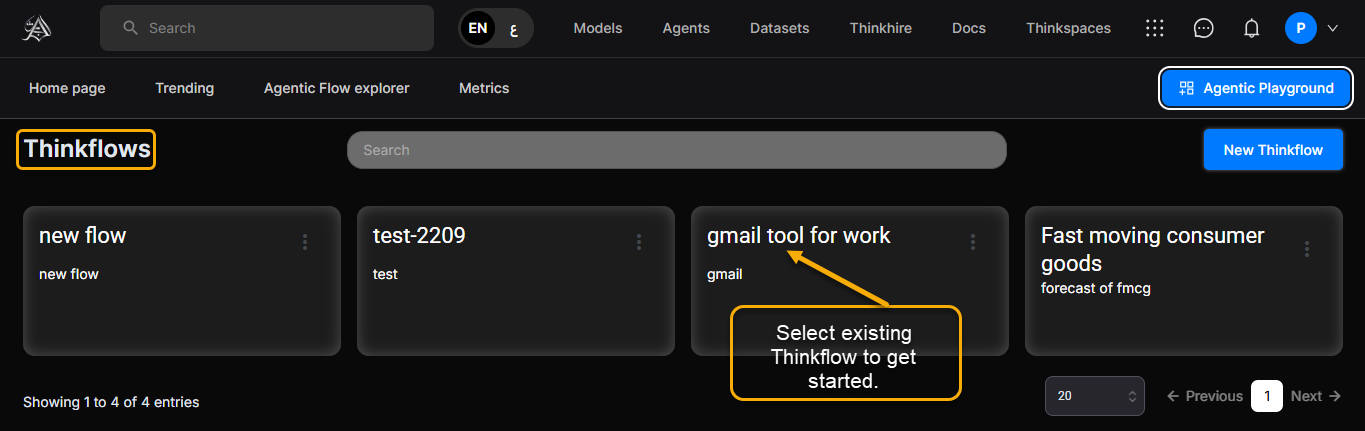
- On the top navigation bar, select Agentic Playground.
- On the Playground screen, select New Thinkflow.
3. Creating and Managing Thinkflows
Create a Thinkflow
- Select New Thinkflow.
- In the Create Thinkflow dialog:
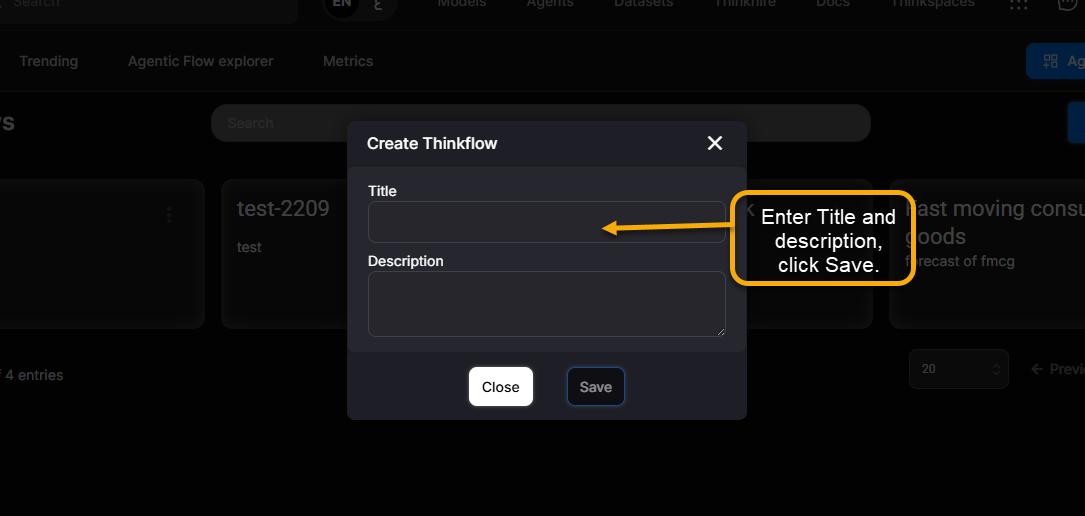
- Enter a Title (e.g., Test Results).
- Enter a Description.
- Select Save. A blank canvas opens.
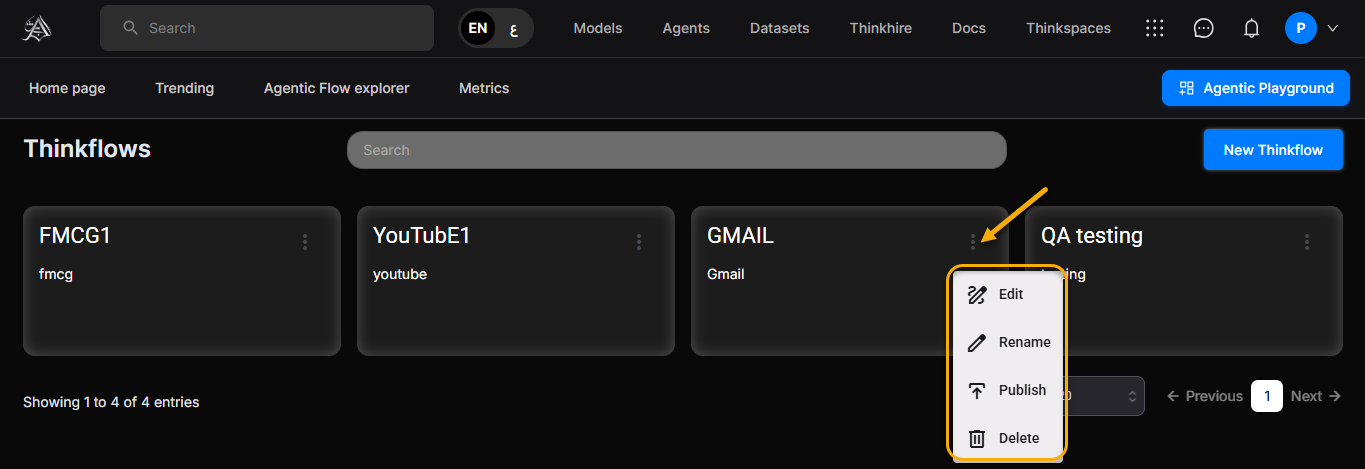
Managing Thinkflows
- To close a flow, select Close (next to Auto Save). The platform returns to the Playground home page.
- From the home page, you can Rename, Edit, Publish, or Delete a Thinkflow.
4. Playground Interface Overview
Top Navigation Bar
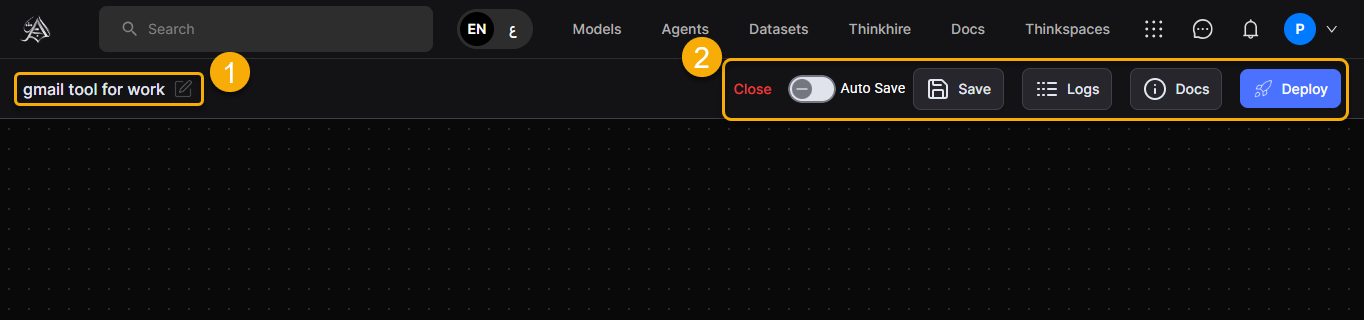
Thinkflow Name – Appears on the left. To rename the Thinkflow, select the Edit (pencil) icon.
Close – Exit the current Thinkflow.
Auto Save – Save changes automatically when enabled (default: off).
Save – Manually saves the current Thinkflow.
Logs – Displays detailed execution logs.
Deploy – Deploys the Thinkflow before execution.
Run – Executes the Thinkflow (enabled after deployment).
Canvas
- The canvas is the workspace for arranging and visualizing Thinkflows.
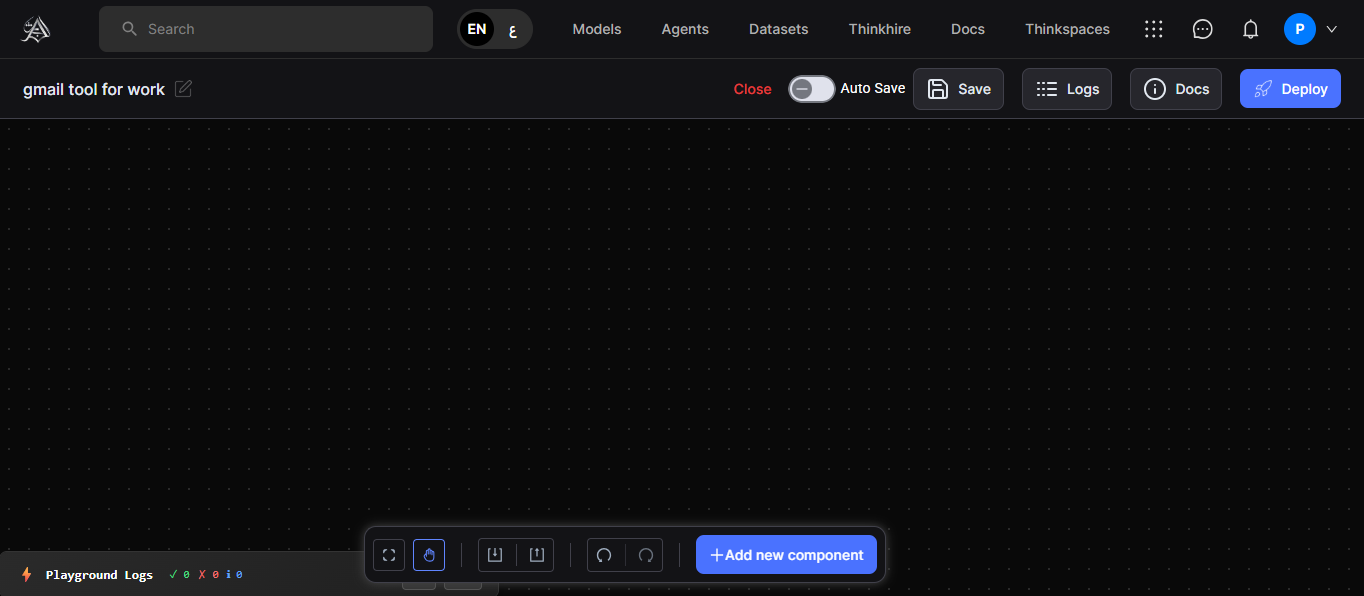
Bottom Action Bar

Grab and Fit to Zoom – Move and resize the canvas view.
Import and Export – Upload or download Thinkflows.
Playground Logs – View detailed execution logs.
+ Add new component (blue button) – Add tools, agents, data, models, inputs, outputs.
Includes a Search bar to find components quickly.
Drag components from the component menu onto the canvas.
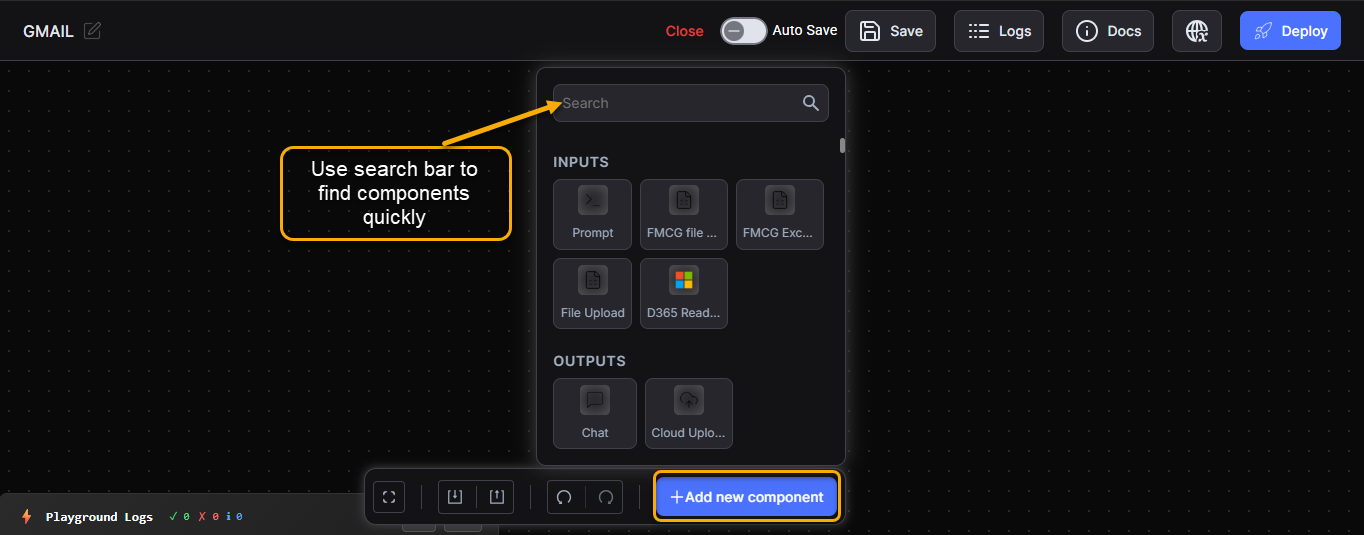
Note: The + Add new component menu uses the label Data to represent datasets.
How to Use the Playground Interface
Start a project – Select + Add new component.
Build your flow – Drag and connect components on the canvas.
Save your work – Use Save or enable Auto Save.
Deploy and Run – Select Deploy, then select Run.
Use logs and docs – Monitor executions and access help resources.
5. Configuring Flow Components
Thinkflows in the Playground consist of modular components. Configure each component individually.
5.1 Inputs
Purpose: Import external data into the Thinkflow.
To configure:
- From the + Add new component menu, drag and drop the Input component onto the canvas.
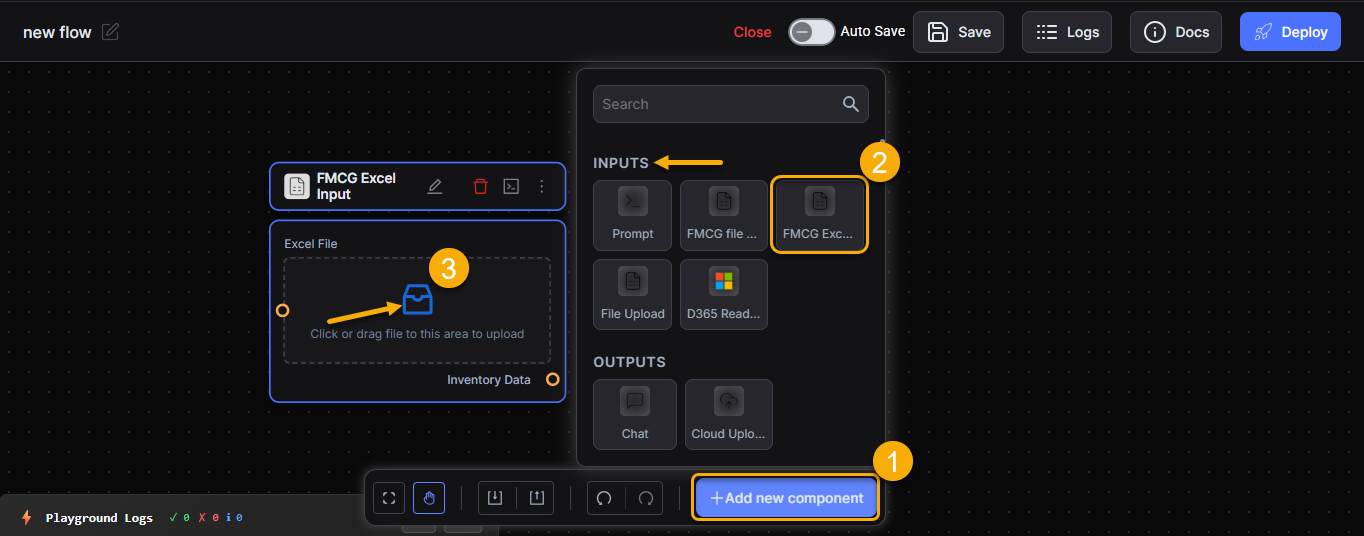
- Select one of the following input types:
- Dynamics 365 – Connect to Microsoft Dynamics 365 to retrieve external data.
- File URL – Enter a direct file URL to import data.
- Excel File – Upload an Excel file that contains data.
- To upload a file, select Choose File or drag the file to the upload area.
- Confirm that the data appears correctly in the workspace.
- Select Save to finalize your configuration.
5.2 Agents
Purpose: Process inputs and apply logic or intelligence to generate outputs.
To configure:
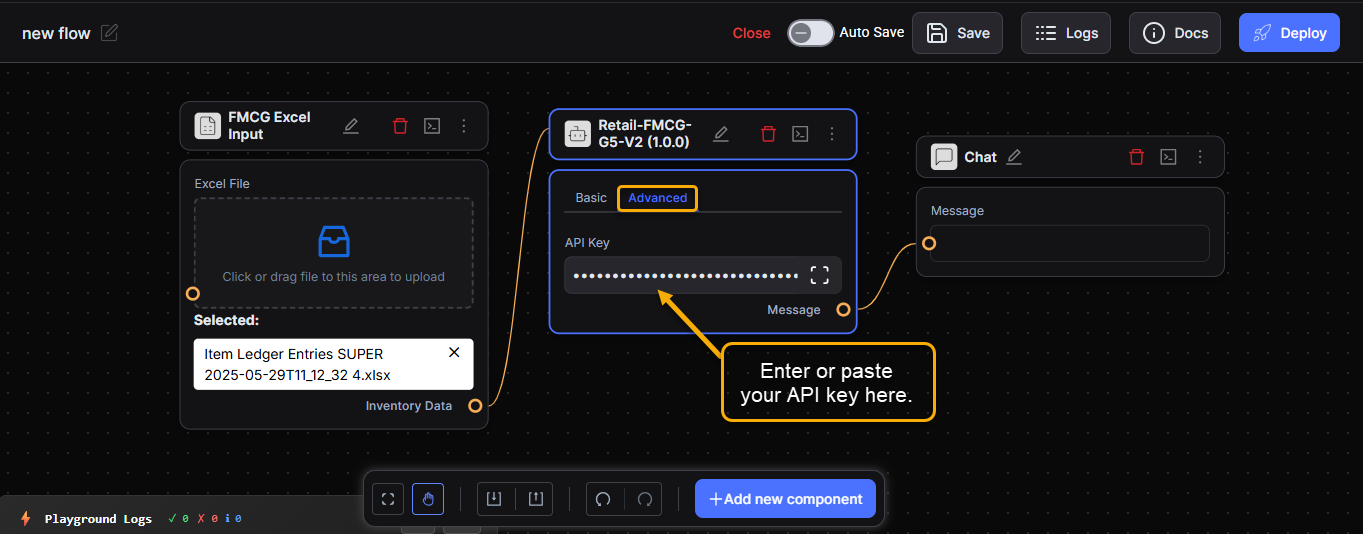
- Drag the Agent component onto the canvas.
- In the Advanced tab, enter the API key to authenticate and enable the agent.
Note: Agents cannot run without a valid API key.
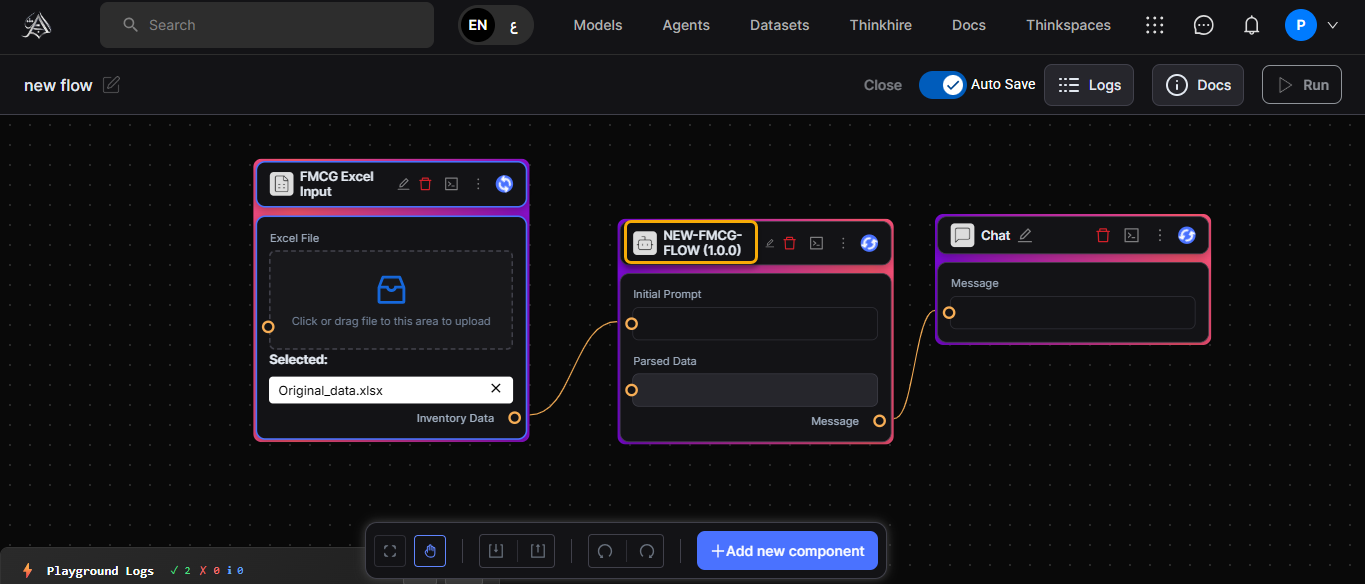
- Connect Components:
- Draw a line from the Input’s output port to the Agent’s input port.
- Add an Output:
- Drag the Chat component onto the canvas.
- Draw a line from the Agent’s output port to the Chat’s input port.
- Save and Deploy
Turn on Auto Save to save changes automatically (default: off), or select Save manually.
Select Deploy to activate the flow.
Select Run to execute it.
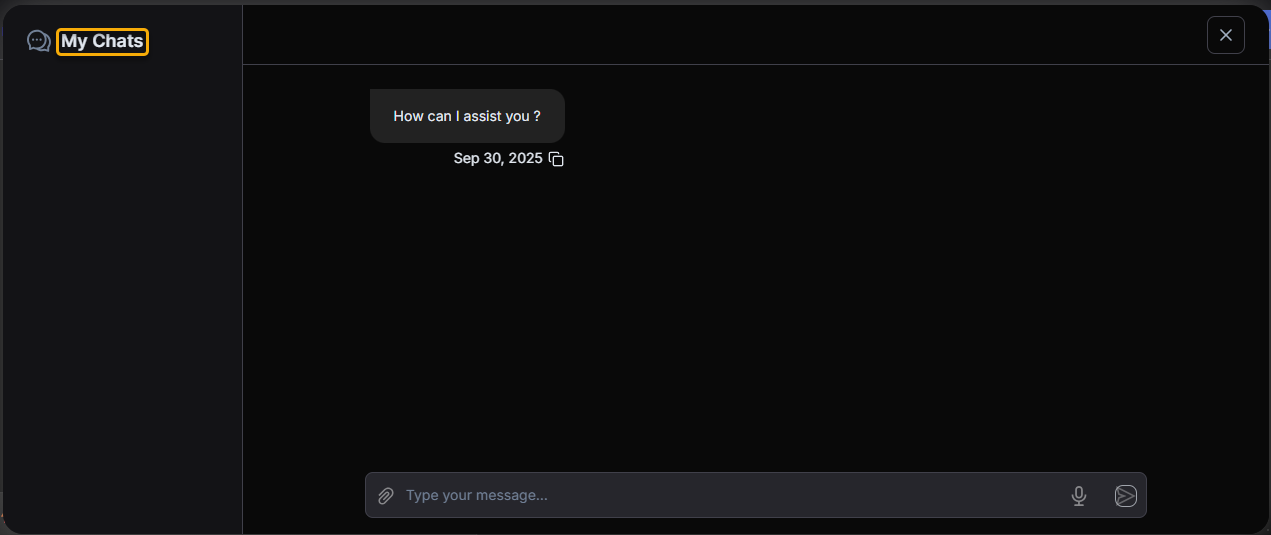
View results in the My Chats Panel.
5.3 Models
Purpose: Perform data processing using LLMs (e.g., OpenAI models).
To configure:
- Drag a Model component onto the canvas.
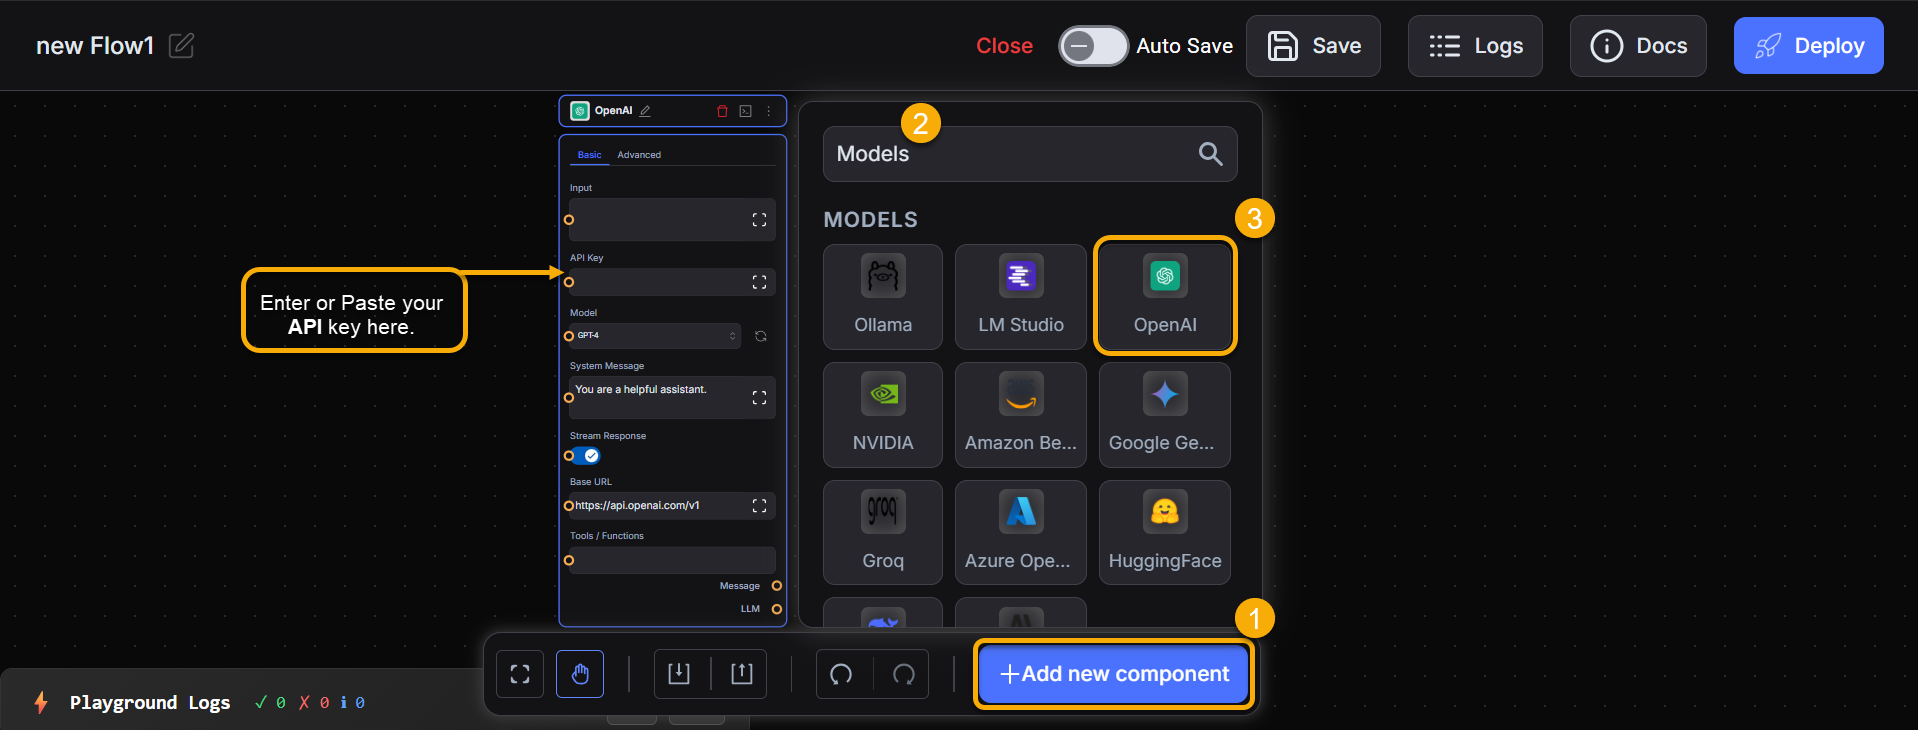
- Select a prebuilt or custom model (e.g., GPT-3.5 Turbo).
- Enter the required API key and parameters.
Note: API Key is required only for external models such as OpenAI.
- Connect the model component to the desired input or agent.
5.4 Datasets
Purpose: Provide static or real-time data to Thinkflows.
To configure:
- Drag the Data component onto the canvas.
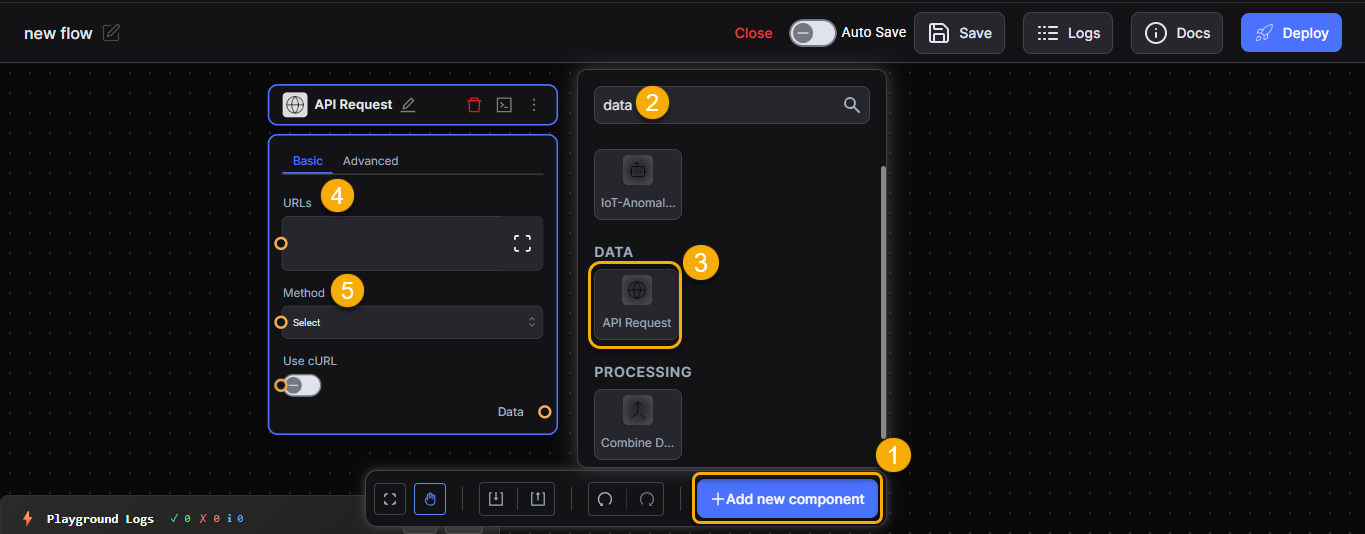
Note: The + Add new component menu uses the label Data to represent datasets.
- Enter the API URL in the URL field.
- Select the appropriate HTTP method from the dropdown (GET, POST, PUT, DELETE).
- Connect the data component to the desired input or agent.
5.5 Outputs
Purpose: Display results from the Thinkflow.
To configure:
Drag the Chat component onto the canvas.
Connect it to the last component in the sequence (e.g., Agent or Model).
6. Connecting Components
To build a Thinkflow:
Select the output port of a component.
Drag the line to the input port of the next component.
Arrange them logically:
Input→ModelorAgent→Chat
Note: All components must be connected before executing the flow.
7. Executing the Thinkflow
Click Run in the toolbar.
The platform processes your Thinkflow.
The results appear in the My Chats Panel.
Type prompts to continue interacting with the agent.
8. Validating and Testing Thinkflows
Use sample input to validate component behavior.
Verify the flow logic in the My Chats Panel.
Confirm expected outputs before publishing your Thinkflow.